

It was decided that a first pass with the ploughs out would be helpful, so these were swung into position, dropped down, and the regulator then moved off in the direction of Peasebrook Farm, crunching and squealing as it went along.

After returning from Peasebrook, the ploughs were withdrawn again, and the brush box dropped, just north of the bridge.

We will be doing this tomorrow, and inserting the rollers that permit the stressing to take place.

As this next 1000m section is almost entirely on a curve, two sets of rollers will be used. The normal flat rollers go under the rail on every 8th sleeper, and to prevent the rail from moving towards the centre of the curve, additional side rollers are attached to the hoops, as demonstrated here by Steve. All very interesting, it should be quite exciting when they do this next Tuesday. Wednesday then is the big clipping up day.

In other news
Riveting at Toddington continues to do well.

Here they are on one of the 5 ridge purlins. They hope to complete it during the day, and this will see 3 out of the 5 ridge purlins complete. The other two, like the first two, still need some rectification work on the strips before they can be rivetted up. This one has had the strips replaced already.

Outside, the two completd ridge purlins are ready for painting, which may happen tomorrow (Broadway being a bit blocked with the container movements)
On the right is the stack of fascia boards, and on the left some of the other purlins, all riveted.
Some more gusset plates have to be made, before trial assembly can be entertained.
*******

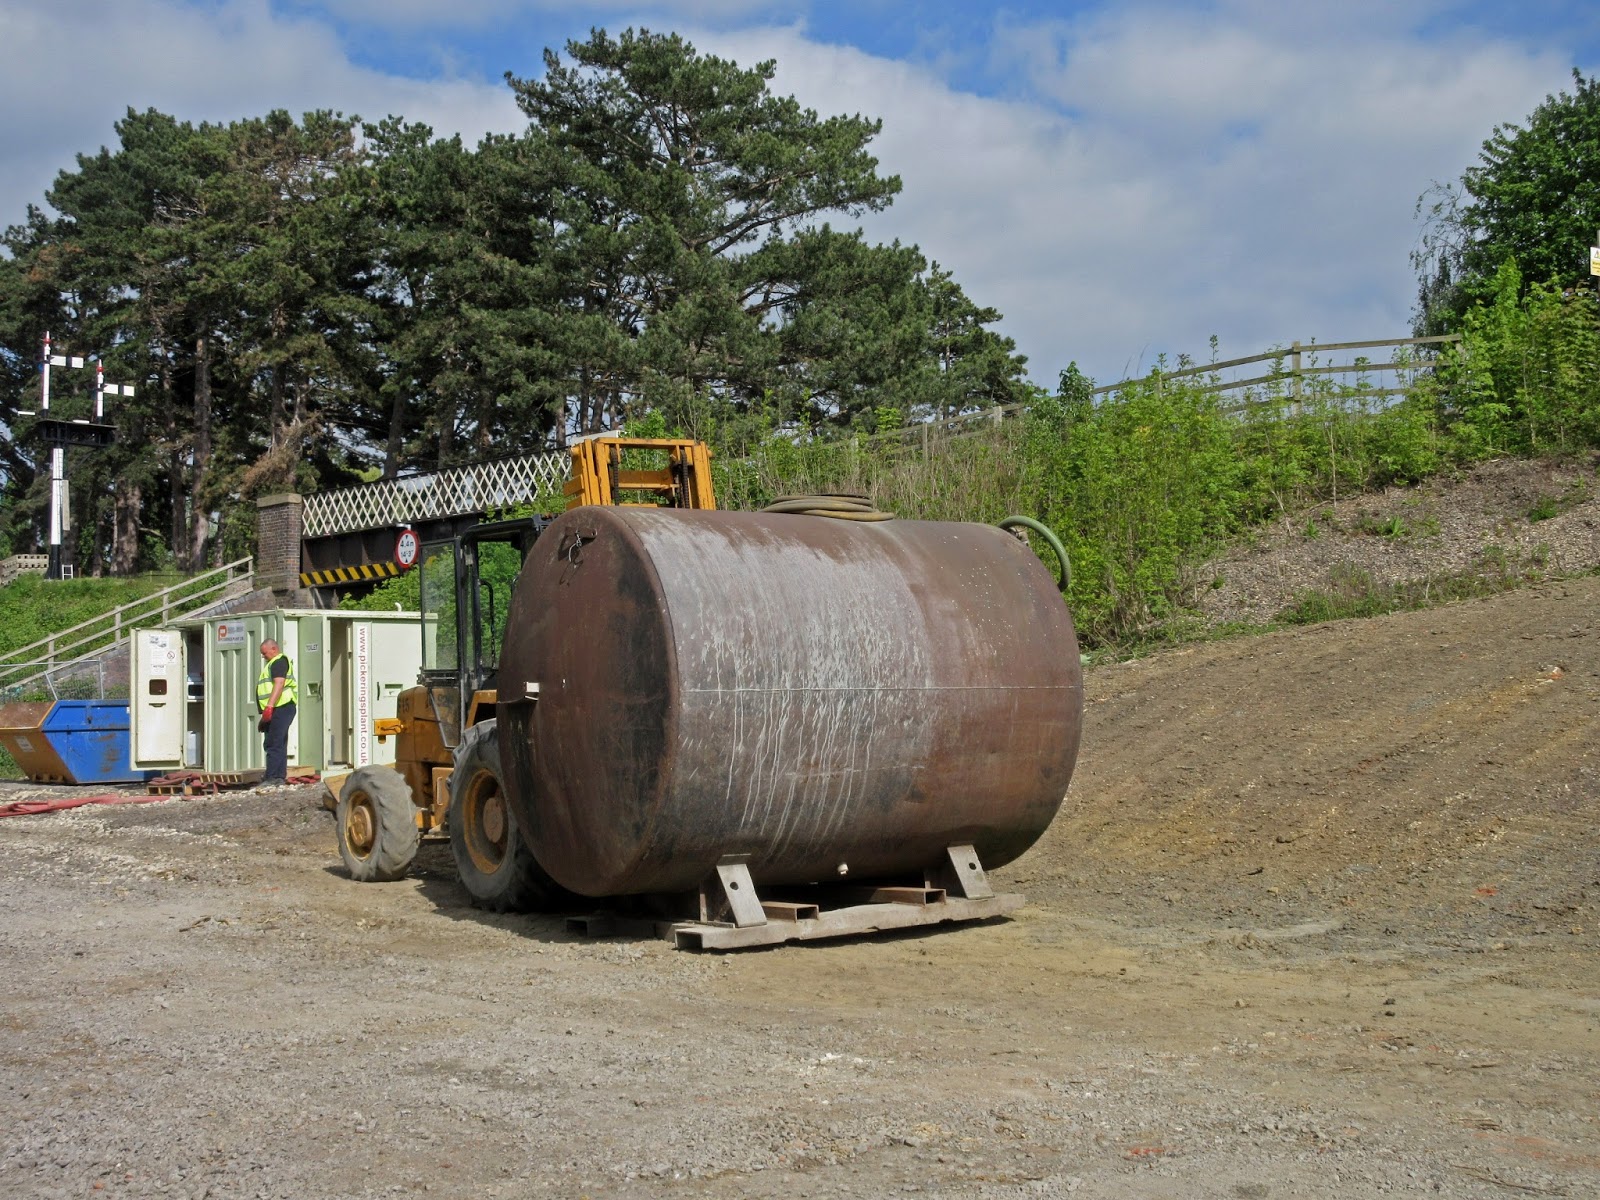
This is the 'water tower' being delivered on a fork lift.
It will be filled with water which will provide the drillers with cement mix that will be injected down the holes.

This morning the drilling rig set off to climb the embankment towards the first hole, located top left, where the worker is standing.
There will be about 500 of these soil nails, spaced 2m appart over a 150m embankment, in several rows. The top row has nails 9m long, the middle 14m and the bottom shorter again.
If the rig starts to climb, won't the rear end overhang jam on the ground?

Aha, the manufacturer (German) has thought of that. You can lift the platform hydraulically, so that it is always horizontal.
And up it went.


Arrived at the top, the rig is positioned so that the bit points at the desired hole. It is then drilled down like a big version of your domestic drill, except that here the bit can be lengthend, as in an oil well, by adding additional lengths of pipe.
The drill head and pipe are sacrificial, i.e. they are single use and stay in the ground.

When the first length is in the ground - it didn't take very long in our case - the operation stops, the cage is opened and the next length is inserted, attached to the first by a sleeve. The pipe is hollow, and down it a cement slurry is pumped. This comes out through the drill bit at the bottom, the rises back up the holes outside the pipe, sealing this in cement, and at the same time filling in any fissures or voids around it. You end up with a concrete rod which is a couple of inches in diameter.
The end of the pipe that sticks out of the ground is finished off with a big plate and a cap. Over the whole area a net is pulled, and this unites all the ends of the rods into one unit. Finally, the whole area is hydro seeded.


Jo, what a great report. What a beast of a machine that is another great report from you and great pictures and writing. Ever thought of writing for a living? Thanks again Jo for a great report....
ReplyDeleteRegards
Paul & Marion
Indeed, a fascinating report, especially the section covering the soil-nailing process and its associated equipment. Thank you very much for putting this on the blog - it explains a great deal! Toddington Ted.
ReplyDeleteJo. Interesting as always. I assume that the gusset plates you talk about are to join the purlins to the trusses, or am I getting mixed up?
ReplyDeleteThat's right, there's a bag full of smaller stuff to be made, to join it all up. Won't be long now.
DeleteIt was a former Dutch colleague who asked me how it worked. I thought I'd better find out!
ReplyDeleteI don't write for a living, but do write historical articles, both for the Cornishman and for my previous club, the SSN in Rotterdam.
I wrote several articles about this signal bell, which I restored.
https://www.youtube.com/watch?v=P-isszwsfT4
Once there were 100s of these in Holland, now there are 2, and this is one of them. I found parts of it in the cellar of an East German water mill. Great fun.
Embankments tend to have two sides. All seems well by the caravan club but the other side is the one needing nailing. Why is that? Great reports, eagerly anticipated. Thanks, Richard
ReplyDeleteYou can see the other side in an early photograph on this page:
Deletehttp://www.broadwaystation.co.uk/scrapbook6.htm
Very interesting. I never saw anything like this when I worked for BR. The nearest I got was on cutting stabilisation with cages filled with rocks and soil and then seeded. All at night so there was very little to see until morning light. This was in the cutting between Stourbridge Junction and Hagley in the 70's. Regards, Paul.
ReplyDeleteA,very interesting look,at the soil nailing process!.That drilling machine,certainly is some beastie!.I,remember during my firing days,at Honeybourne.A,few times,while working the local goods,stopping at sites,between Broadway,and Weston Subedge,where a gang were drilling,and pumping concrete,into the embankments,to stablise them.We supplied them with water,from the tender,of the locomotive!. Regards!. Anthony.
ReplyDeleteThe soil nailing equipment reminds me of the mole used in Thunderbirds. As seen here;
ReplyDeleteVirgil is laying charges in the extremely hot pit, in order to save the Sidewinder crew, and Scott pilots the Mole to drill down towards him, and get him out.
https://www.youtube.com/watch?v=eWO2RNjYH3M
Virgil Provides Backup In The Mole | Thunderbirds Are Go Clip
https://www.youtube.com/watch?v=8ZewjTMhfqI
All great action going on Broadway Station embankment.
Regards, Mark.